Craft Your Own Leather Hobo Bag: A Step-by-Step Guide
Making your own leather hobo bag is totally doable! You can create a stylish, custom bag by following a few key steps. We’ll guide you through selecting the right leather, cutting out your pattern, and stitching it all together for a bag that’s uniquely yours.
Creating a handmade leather hobo bag allows for personalization in size, shape, and hardware. Many crafters find satisfaction in working with natural materials like leather. It’s a rewarding project that results in a durable and chic accessory you’ll love for years.
- Choose your preferred leather type and thickness.
- Find or create a simple hobo bag pattern.
- Carefully cut out all the leather pieces.
- Stitch the seams securely using a strong needle and thread.
- Add any desired hardware like D-rings or buckles.
Ready to get started? Below, we’ll walk you through everything you need to know to make your very own leather hobo bag, step by step.
“`htmlCrafting Your Leather Hobo Bag: A Step-by-Step Guide
So, you’re ready to dive into making your own leather hobo bag? That’s fantastic! It’s a project that combines creativity with a touch of old-school craftsmanship. We’re here to walk you through each step, making it feel less like a daunting task and more like a fun journey. You’ll end up with a bag that’s not just functional but also a proud reflection of your hard work and personal style.
Choosing the Perfect Leather for Your Hobo Bag
The first big decision is your leather. Think of this as choosing the personality of your bag. For a classic hobo, you’ll want something that has a nice drape and can soften with wear. Choosing the right leather is the first step in creating a beautiful hobo bag.Full-grain or top-grain leather are excellent choices. They are durable and develop a beautiful patina over time.
Leather Thickness Matters
Leather thickness is measured in ounces (oz) or millimeters (mm). For a hobo bag, a weight between 4-6 oz (1.6-2.4 mm) is usually ideal. This thickness offers a good balance. It’s sturdy enough to hold its shape without being too stiff or heavy. We found that lighter weights can sometimes feel flimsy, while much thicker leather might make your bag too bulky.
Types of Leather to Consider
You’ll find various leather types. Cowhide is the most common and versatile. It’s durable and comes in many finishes. Lambskin or deerskin are much softer and more luxurious but also more delicate. For a beginner, cowhide is often the most forgiving and readily available. We recommend looking at options like vegetable-tanned leather if you plan to dye or tool your bag. It holds shape well and is a joy to work with.
Gathering Your Tools and Materials
Before you cut into that beautiful hide, let’s make sure you have everything you need. Having your tools ready will make the process smooth and enjoyable. Think of it like preparing your ingredients before cooking a great meal.
Essential Tools for Leatherwork
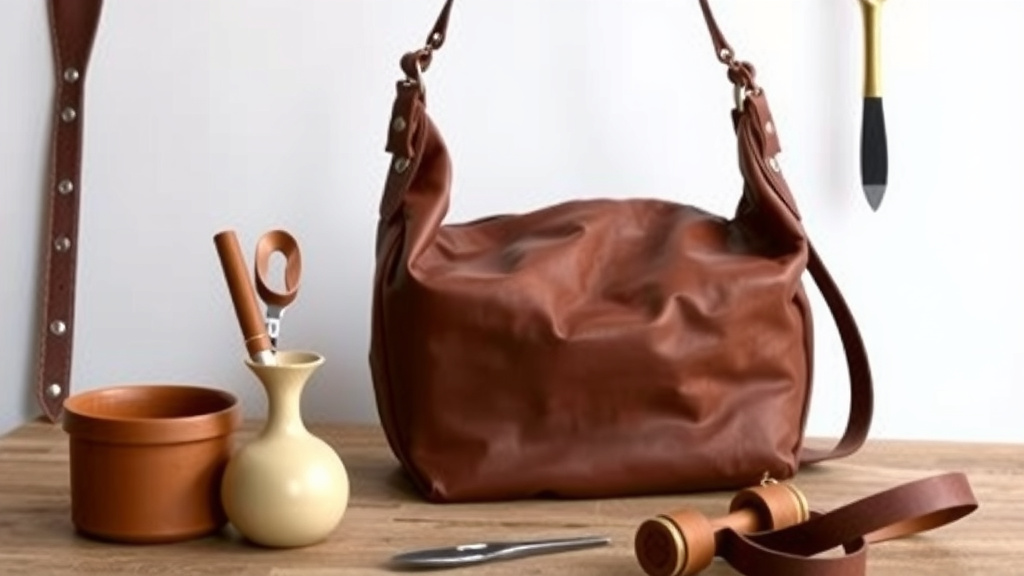
- Cutting tools: A sharp utility knife or rotary cutter and a cutting mat are a must.
- Marking tools: A scratch awl or a leather marking pen helps you trace your pattern.
- Stitching tools: A stitching groover, stitching chisel or diamond punches, and a harness needle are key for creating neat stitches.
- Assembly tools: A mallet, a sturdy work surface, and potentially some leather cement will be helpful.
- Finishing tools: Edge bevelers and burnishers will give your bag a professional look.
The Right Thread and Hardware
For stitching, you’ll want a strong, waxed thread. Polyester or nylon threads are durable and resistant to rot. Common sizes are 0.8mm to 1.0mm. For hardware, consider D-rings for strap attachments, a zipper or magnetic snap for closure, and maybe some rivets for added detail and reinforcement. The style of hardware can dramatically change the look of your bag.
Cutting Out Your Hobo Bag Pattern
Now comes the satisfying part: bringing your pattern to life on the leather. Accuracy here is important, but don’t stress too much! Even slight variations can add character.
Selecting or Creating Your Pattern
You can find many free or purchasable hobo bag patterns online. Many are designed with beginners in mind and include detailed instructions. If you’re feeling creative, you can sketch your own. A basic hobo shape is often a crescent or a large curved rectangle. Remember to include pieces for the front, back, bottom, and strap. Don’t forget to add seam allowances!
The Cutting Process
Lay your leather flat on a cutting mat. Place your pattern pieces on the leather, paying attention to the direction of the grain if applicable. Use your marking tool to trace around the pattern pieces. When cutting, use a steady hand and make clean, deliberate strokes. It’s often better to make multiple light passes with your knife than one forceful one. We found that using a ruler as a guide for straight edges helps ensure precision.
Stitching Your Leather Hobo Bag Together
This is where your bag truly starts to take shape. Hand-stitching leather is a rewarding process. It creates a strong, beautiful seam that machine stitching sometimes can’t replicate.
Preparing for Stitching
Before you stitch, you’ll want to create your stitch line. Use a stitching groover to create a shallow channel along the cut edges where your seams will be. This helps protect your stitches from wear. Then, use your stitching chisel or punches to create evenly spaced holes. We recommend spacing holes about 3-4mm apart for a nice, consistent look.
The Saddle Stitch Method
The saddle stitch is the go-to for hand-stitching leather. It uses two needles on a single thread. You pass one needle through a hole, then the other needle through the same hole from the opposite side. This creates a very strong and durable stitch. Keep your tension consistent throughout. We found that practicing the saddle stitch on scrap leather first is a great idea.
| Task | Notes |
|---|---|
| Prepare Stitching Lines | Use a groover for a clean channel. |
| Punch Stitching Holes | Ensure even spacing for a professional look. |
| Cut Your Thread | Measure enough length for the entire seam, plus extra. |
| Thread Your Needles | Use two needles for the saddle stitch. |
| Begin Saddle Stitching | Maintain consistent tension. |
| Secure the End | Backstitch a few holes for extra strength. |
Adding the Finishing Touches
You’re almost there! The final details will really make your hobo bag shine and personalize it even further.
Attaching Straps and Hardware
Attach your D-rings or other hardware using rivets or strong stitching. Make sure they are securely fastened, as they’ll bear the weight of your bag’s contents. Add your main strap, ensuring it’s comfortable and the right length for you. If you’re adding a zipper or closure, install it now.
Edge Finishing for a Professional Look
For a polished appearance, finish your bag’s edges. Use an edge beveler to round off the sharp corners. Then, you can burnish the edges. Apply a small amount of water or gum tragacanth and rub the edge firmly with a wood slicker or canvas cloth. This smooths and seals the leather fibers. Many crafters find this step makes a huge difference (LeathercraftTips.com).
“`
Conclusion
You’ve now seen how making your own leather hobo bag is a rewarding journey. From selecting the perfect leather to stitching those strong seams, each step brings you closer to a bag you’ll be proud to carry. Remember to take your time, enjoy the process, and don’t be afraid to make it your own. Once you’ve completed your bag, start thinking about your next leather project – perhaps a matching wallet or a durable tote!
Frequently Asked Questions
What’s the best way to learn saddle stitching?
We found that practicing the saddle stitch on scrap leather pieces is highly recommended. Use two needles and keep your thread tension even as you work through each punched hole. Many crafters watch online video tutorials to see the technique in action.
Can I use a sewing machine for my leather hobo bag?
While hand-stitching is traditional and often preferred for its strength and aesthetic, some heavier-duty sewing machines can handle leather. You’ll need a specific leather needle and a walking foot attachment. However, it’s often easier for beginners to master hand-stitching first.
How do I care for my new leather hobo bag?
To keep your bag looking its best, clean it with a soft, damp cloth. For deeper cleaning or conditioning, use a leather cleaner and conditioner specifically designed for the type of leather you used. We also recommend storing it away from direct sunlight and moisture. To keep your bag looking its best, consider using a good leather cleaner and conditioner.
What if my stitches don’t look perfectly even?
Don’t worry if your first few stitches aren’t perfectly uniform! Slight variations often add to the charm of a handmade item. As you continue practicing, your stitch consistency will improve. Focus on keeping the tension even for durability.
Where can I find good leather patterns for hobo bags?
You can find many free and paid hobo bag patterns online. Websites dedicated to leathercraft, crafting forums, and even marketplaces like Etsy often have a wide selection. Look for patterns with clear instructions, especially if you’re a beginner.
![10 Best Men'S Toiletry Bag Leather [2026]](https://mybestreviewss.com/wp-content/uploads/2026/08/10-best-men-s-toiletry-bag-leather-2026-featured-768x432.jpg)