How to Line a Leather Bag: A Step-by-Step Guide
Lining a leather bag is a great way to add durability and style. You can successfully line your leather bag by choosing the right fabric, cutting it to size, and carefully sewing it in place. This process can even give an old bag a new life. It’s a rewarding DIY project for any leather enthusiast. To keep your newly lined bag looking its best, consider using appropriate leather care products.
When you line a bag, you’re not just adding a pretty interior. A good lining can protect the leather from the inside out. It also helps organize your belongings better. Many find it makes their bags feel more luxurious, too. We found that the right lining material can make a big difference.
- Choose a sturdy yet pliable fabric.
- Measure and cut the lining precisely.
- Attach the lining with neat stitches.
- Consider adding pockets for extra function.
Ready to transform your leather bag? Let’s walk through exactly how to line it step by step, so you can enjoy your refreshed accessory.
You’ve got a beautiful leather bag, but maybe the inside is looking a little sad, or perhaps it just needs a functional upgrade. Lining a leather bag is a fantastic way to revitalize its appearance and boost its longevity. It’s a project that might seem daunting, but with a little patience, you can achieve a professional-looking finish. We’ve found that the right preparation makes all the difference.
Adding a Lining to Your Leather Bag: A Step-by-Step Guide
Giving your leather bag a fabric lining is like giving it a nice, soft hug from the inside. It protects the leather and makes it easier to find your keys. This guide will walk you through the entire process. You’ll learn how to select materials, make accurate measurements, and sew everything together perfectly. Let’s get started on transforming your bag!
Choosing the Right Lining Fabric
The fabric you choose is key to a successful lining. You want something that’s durable enough for daily use but also has a bit of slip so your items can move freely. Think of it like picking the right outfit for your bag – it needs to be both stylish and functional.
Durable and Smooth Options
Cotton blends are often a great choice. They are breathable, washable, and come in endless colors and patterns. A medium-weight cotton canvas offers good structure without being too stiff. We also found that a polyester blend can be very durable and resistant to snagging. Just make sure it’s not too slippery, or your phone might slide right out!
Considerations for Longevity
You’ll want a fabric that can withstand the friction of everyday items. Heavy denim or tightly woven synthetic fabrics are good options. Avoid anything too stretchy or flimsy, as it will wear out quickly. Many sources suggest that a fabric with a thread count of at least 200 is a good indicator of durability (Consumer Reports).
A Table of Popular Lining Fabrics
| Fabric Type | Pros | Cons |
|---|---|---|
| Cotton Canvas | Durable, good structure, easy to sew, many patterns | Can be a bit stiff if very heavy weight |
| Polyester Blend | Very durable, snag-resistant, smooth finish | Less breathable than cotton |
| Quilted Fabric | Adds padding and a luxurious feel | Can add bulk, more complex to sew neatly |
| Satin/Silk (Lined) | Very smooth, luxurious feel | Can be slippery, requires careful handling, may need a backing |
Measuring and Cutting Your Lining Fabric
Precision here is your best friend. Taking accurate measurements will prevent a lining that’s too big or too small. You want it to fit snugly, like a tailor-made suit for your bag.
Mapping Out the Bag’s Interior
You’ll need to create a pattern for your lining. You can do this by carefully measuring the inside dimensions of your bag. For a basic lining, you’ll typically need pieces for the front, back, sides, and bottom. Some people find it easier to create a paper pattern first. You can even use the existing lining (if there is one) as a template, but be sure to account for any wear and tear on the old lining.
Adding Seam Allowances
Don’t forget to add a seam allowance to each piece. A standard 1/2 inch (about 1.3 cm) seam allowance is usually sufficient. This extra fabric is what you’ll sew through to join the pieces. We found that marking these allowances clearly with tailor’s chalk or a fabric pen makes cutting much easier.
Cutting with Care
Once your pattern is ready and marked on your fabric, use sharp fabric scissors to cut out your pieces. A rotary cutter and mat can also provide very clean edges, especially for straight lines. Accuracy is especially important for the main body pieces.
Sewing the Lining Together
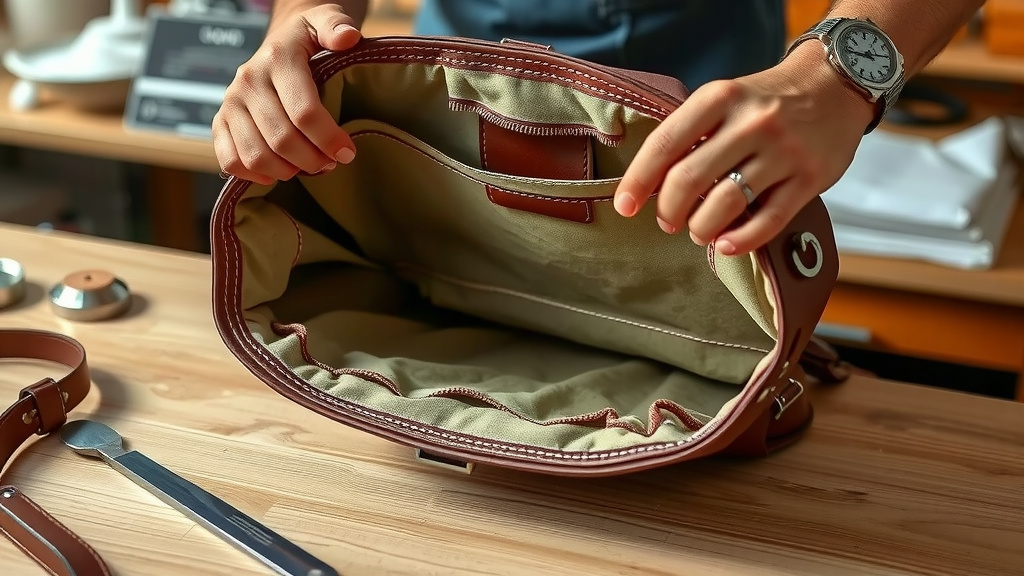
This is where your bag starts to get its new interior. Sewing the lining pieces together will create a separate fabric “bag” that will fit inside your leather one. You can do this by hand or with a sewing machine.
Constructing the Main Body
Start by sewing the side panels to the front and back panels. If you’re using a sewing machine, set it to a straight stitch. If you’re hand-sewing, a backstitch is a strong and reliable choice. Many sewing guides recommend reinforcing the seams with a double stitch for added durability (Good Housekeeping).
Attaching the Bottom Panel
Once the sides are joined, it’s time to attach the bottom panel. Carefully align the edges and stitch them securely. Ensure there are no gaps or puckers, as this is where the lining will meet the base of your leather bag.
Creating Pockets (Optional)
Pockets can make your lining incredibly functional. You can sew them onto the lining panels *before* you assemble the main lining body. Simple patch pockets are easy to create. You can also add zippered pockets for extra security. We found that placing a phone pocket on one side and a smaller pocket for keys or cards on the other significantly improves bag organization.
Attaching the Lining to the Leather Bag
Now for the final step: getting that beautiful, newly sewn lining into your leather bag and securing it. This requires a delicate touch.
Fitting the Lining Inside
Gently insert the fabric lining into your leather bag. Smooth it out, making sure it fits snugly against the sides and bottom. It should sit neatly without bunching or pulling.
Securing the Top Edge
The most common method is to fold the top raw edge of the lining fabric inwards by about 1/2 inch. Then, carefully hand-stitch this folded edge to the inside top edge of the leather bag. Use a strong thread that matches your lining or the leather. A whipstitch or an invisible stitch works well here. We found that small, consistent stitches create the neatest finish. Some prefer to use a strong fabric glue designed for leather, but sewing offers a more durable and professional result.
Final Inspection and Adjustments
Once everything is sewn, take a step back and admire your work! Check that the lining is secure all the way around and lies flat. Make any minor adjustments needed. Your bag is now ready for its next adventure, with a fresh, durable, and stylish interior! After lining your bag, you might want to explore the best leather bag cleaner and conditioner options to maintain its exterior.
Quick Checklist for Lining Your Leather Bag:
- Select a durable, smooth fabric.
- Measure the bag’s interior accurately.
- Add seam allowances to your fabric pieces.
- Cut fabric pieces precisely.
- Sew lining pieces together securely.
- Hand-stitch the lining neatly into the bag.
Conclusion
You’ve now learned how to bring new life to your leather bag with a custom lining. Remember, choosing the right fabric and measuring carefully are key steps. Sewing it in with neat stitches will give your bag a professional, durable finish. It’s a project that truly enhances both the look and function of your favorite accessory. Don’t be afraid to get creative with patterns or add those extra pockets. Your beautifully lined bag is just a few steps away!
Frequently Asked Questions
How do I attach the lining without sewing through the leather?
The best way to avoid sewing through your leather is to hand-stitch the lining’s folded top edge directly to the inside of the bag’s top opening. Use a strong thread and small, consistent stitches for a clean look. Some prefer fabric glue for leather, but sewing typically offers more durability.
Can I line a very old or worn leather bag?
Yes, lining can be a fantastic way to cover up interior wear and tear and reinforce a bag that’s seen better days. Ensure the existing leather is stable enough to handle the process. You might need to patch any significant holes in the leather before adding the new lining.
What if my lining fabric is slightly thicker than the leather?
If your lining fabric is a bit thicker, you may need to adjust your seam allowances and how you fold the top edge for attachment. You might also find that the lining adds a bit of structure, which can be a good thing. Just ensure it doesn’t make the bag overly bulky or difficult to close.
How do I prevent the lining from twisting inside the bag?
Ensuring the lining is cut to the exact dimensions of your bag’s interior and securely attached at the top is crucial. If you’re adding a base piece, make sure it’s also well-secured. Consistent, small stitches around the top opening help prevent movement.
What’s the best fabric if I want my lining to be easy to clean?
For easy cleaning, a polyester blend or a tightly woven cotton canvas is a good choice. These fabrics are generally more resistant to stains and wear than natural fibers like silk or rayon. You can usually spot-clean them with a damp cloth or mild soap if needed.
![10 Best Leather Scraps Bag [2026]](https://mybestreviewss.com/wp-content/uploads/2026/09/10-best-leather-scraps-bag-2026-featured-768x432.jpg)
![10 Best Soft Leather Bags [2026]](https://mybestreviewss.com/wp-content/uploads/2026/08/10-best-soft-leather-bags-2026-featured-768x432.jpg)