Hand Sew a Leather Bag: A Step-by-Step Guide
Yes, you absolutely can hand sew a leather bag! It’s a rewarding skill that lets you create beautiful, durable accessories. With the Yes, you absolutely can hand sew a leather bag, and our guide to the best leather for making bags can help you choose the right material.right tools and a little patience, you’ll be stitching up your own leather creations in no time. You don’t need a fancy machine to get professional-looking results.
Hand sewing leather gives you a wonderful sense of accomplishment. Many artisans prefer it for the unique character it adds to each piece. It allows for precise control, which is key when working with thicker materials like leather. Plus, the look of hand-stitched seams is often considered a mark of quality.
- Use a heavy-duty needle designed for leather.
- Choose a strong thread, like waxed linen or polyester.
- Punch holes first to make stitching easier.
- Consider saddle stitching for a very strong seam.
- Practice your stitch on scrap leather first.
Ready to get your hands on some leather? Let’s walk through exactly how to hand sew your own bag, step by step.
Getting Started with Hand Sewing Your Leather Bag
So, you want to stitch up your own leather bag by hand? That’s a fantastic goal! You’ll be creating something durable and stylish. Many people wonder if it’s really possible without a sewing machine. The short answer is a resounding yes. With the right approach, your hand-sewn bag can look incredibly professional.
Hand sewing leather is a skill that connects you to traditional craftsmanship. Think of it as a creative journey. It allows for precision and a personal touch you won’t get from mass-produced items. Plus, the satisfaction of wearing something you made yourself is unmatched.
Essential Tools for Leather Stitching
Before you even think about cutting leather, gather your supplies. Having the right tools makes the entire process much smoother. Trying to force a regular sewing needle through thick leather is a recipe for frustration. You need tools designed for the job. Having the right tools makes the entire process much smoother, and our guide to the best leather glue for bags can help you find the right adhesive.
Needles Made for Leather
You’ll need a leather sewing needle. These aren’t your typical sewing needles. They often have a triangular or diamond-shaped point. This sharp tip pierces the leather easily. This prevents the needle from pushing the leather fibers apart, which can create jagged holes. We found that blunt needles just don’t cut it.
Thread Strength Matters
For your seams to last, you need a strong thread. Standard cotton thread will break under pressure. Look for waxed linen thread or a heavy-duty polyester thread. The wax coating helps the thread glide through the leather. It also adds water resistance and prevents fraying. Many leatherworkers swear by waxed linen for its traditional strength.
Getting the Holes Ready
Punching holes before you sew is key. This creates a clear path for your needle. You can use an awl or a pricking iron. An awl is a pointed tool that you push through the leather. A pricking iron has multiple pointed teeth that mark evenly spaced holes or slits. Both are much better than trying to force a needle without guides. We found that a pricking iron gives you more consistent spacing.
Other Handy Items
Don’t forget a few other essentials. You’ll need a sturdy pair of shears or a rotary cutter for clean leather cuts. A cutting mat protects your work surface. Clamps or binder clips can hold pieces together while you work. A leather edge beveler can give your bag a professional finish by rounding the edges. Lastly, a thimble or finger cots will protect your fingers from the needle.
Preparing Your Leather for Sewing
Once you have your tools, it’s time to prepare your leather. This involves marking out your pattern and cutting your pieces. Precision here will save you headaches later.
Choosing and Cutting Your Pattern
Start with a simple pattern for your first bag. A basic tote or clutch is a great choice. You can find many free patterns online. Transfer the pattern to your leather using a chalk pencil or a silver pen. Make sure your markings are clear and accurate. Always cut on the flesh side (the rough side) of the leather for cleaner lines.
Punching Stitching Holes
This is where your awl or pricking iron comes in. Mark your stitching line with a ruler. Then, carefully punch holes along this line. For a straight stitch, you’ll punch holes every 3-5 millimeters. If you’re using a pricking iron, it will mark all your holes at once. This consistency is vital for a neat finish. We learned that patience during this step pays off big time.
Holding Pieces Together
Leather doesn’t behave like fabric. It’s thicker and less forgiving. You need to keep your pieces aligned perfectly before and during stitching. You can use leather cement to temporarily hold pieces in place. Alternatively, binder clips or specialized sewing clamps work well. This prevents shifting while you’re working. Avoid using tape, as it can leave sticky residue.
Mastering the Saddle Stitch
The saddle stitch is the go-to method for hand sewing leather. It’s incredibly strong and looks fantastic. It involves using two needles on a single thread. This creates a locked stitch that’s very durable.
The Saddle Stitch Technique
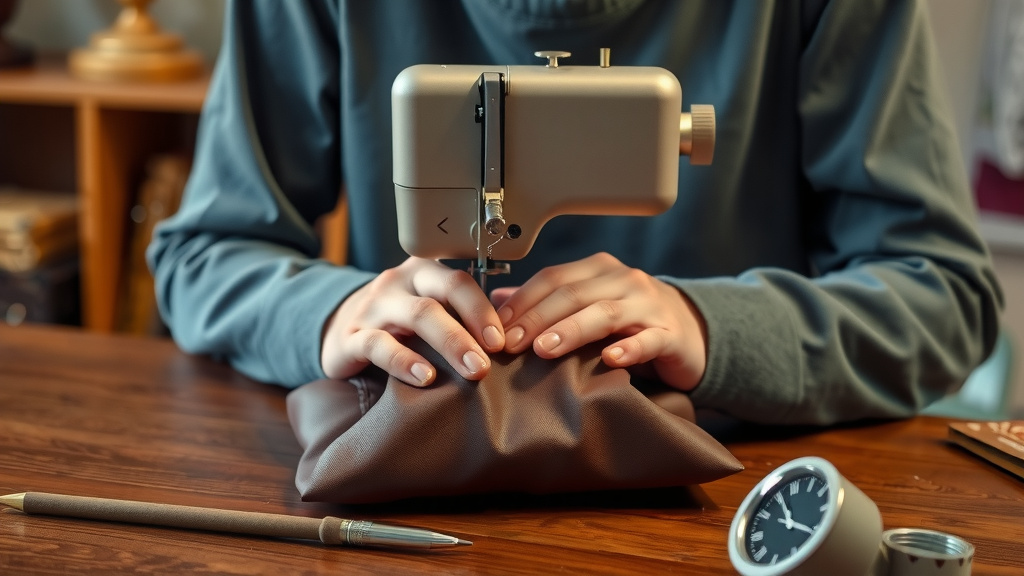
Thread a long piece of waxed thread onto one needle. Then, thread another needle onto the other end of the same thread. You’ll have two needles on one piece of thread. Start at one end of your pre-punched holes. Push one needle through the first hole. Pull it through until you have an equal amount of thread on both sides. Now, take the second needle and push it through the same hole from the other side. You want the needles to meet in the middle. Pull both needles firmly to tighten the stitch. Continue this process, passing one needle through each hole, and then the second needle through the same hole, alternating which needle goes first through the hole to lock the stitch. This creates a strong, continuous seam.
Achieving Consistent Tension
Consistent tension is crucial for a professional look. If your stitches are too loose, they’ll look sloppy. If they’re too tight, you risk tearing the leather. We found that pulling both needles equally after each stitch helps maintain even tension. It might take a little practice to get a feel for it. Imagine you’re giving the thread a firm hug, not a death grip.
Finishing Your Stitches
When you reach the end of your seam, you need to secure the thread. You can do this by backstitching. Sew back over the last two or three stitches using both needles. Then, carefully trim the excess thread close to the leather. Some people like to add a tiny drop of glue to the knot to further secure it.
Common Challenges and Solutions
Working with leather can present unique challenges, especially when hand sewing. Don’t get discouraged if things aren’t perfect right away.
Dealing with Mistakes
Made a mistake? It happens to the best of us. If it’s a small error, you might be able to carefully unpick the stitches with an awl or a seam ripper. For bigger mistakes, sometimes it’s best to start that section over. That’s why we always recommend practicing on scrap leather first. It’s a low-pressure way to build your skills.
Edge Finishing Tips
Raw leather edges can look unfinished. You can burnish them to make them smooth and slightly shiny. Use a burnishing tool or even a piece of canvas. Moisten the edge slightly with water or gum tragacanth. Rub the tool back and forth along the edge until it becomes smooth. This is a simple step that makes a huge difference in the final appearance.
Here’s a quick checklist to keep you on track:
- Gather all your leather-specific tools first.
- Cut your leather pieces accurately from your pattern.
- Punch consistent stitching holes with an awl or pricking iron.
- Use the saddle stitch for strong, beautiful seams.
- Practice tension control on scrap pieces.
- Finish your edges for a professional look.
Conclusion
You’ve learned that hand sewing a leather bag is entirely achievable and incredibly rewarding. By gathering the right leather-specific tools, preparing your materials carefully, and mastering the strong saddle stitch, you’re well on your way. Remember that patience and practice are your best allies. Don’t be afraid to make mistakes; they’re part of the learning process. Your next step? Choose a simple pattern, gather your supplies, and start stitching your first beautiful, handmade leather bag!
Frequently Asked Questions
What kind of leather is best for beginners to hand sew?
For your first bag, consider using vegetable-tanned leather in a medium weight (around 4-6 ounces). It holds its shape well and is easier to punch holes through than softer leathers. Avoid very thin or very thick leathers initially, as they can be more challenging for a beginner to work with.
How do I make sure my stitch holes are perfectly straight?
Using a pricking iron with a ruler is your best bet for consistent holes. Mark your stitch line with a pencil, then align the pricking iron on the line and strike it with a mallet or mallet. This creates evenly spaced marks or slits that guide your awl or needle perfectly.
Can I use a regular sewing machine needle for leather?
No, you really shouldn’t. Regular sewing machine needles are not designed for the thickness and toughness of leather. They can bend, break, or damage the leather, and you’ll find it nearly impossible to push them through. Always use a dedicated leather sewing needle.
How much thread do I need for a hand-sewn leather bag?
A good rule of thumb is to measure four times the length of the seam you plan to sew. It’s always better to have a little extra thread than to run short midway through a stitch. For the saddle stitch, remember you’ll be using two needles, so thread a single long strand.
What’s the best way to finish the raw edges of my leather bag?
Burnishing is a popular and effective method for finishing raw edges. After cutting your leather, use a burnishing tool, canvas, or even a piece of hard wood to rub the edge firmly. You can use a little water or a burnishing agent like gum tragacanth to help create a smooth, slightly shiny surface.