Step by step 3d printing process
Have you ever wondered how 3D printing works? From a simple idea in your head to a physical object, it’s a fascinating process to watch unfold. But where do you even start? Is it difficult to do? What are the basics that you need to know?
3D printing has been gaining popularity over the past few years, with more and more people interested in creating their own unique designs. However, the process can seem intimidating for beginners. With so many different types of 3D printers and software available, it’s hard to know where to begin.
In this article, we will break down the step-by-step 3D printing process so that even those with no experience in the field can understand. Whether you’re interested in creating prototypes for a business or just want to try your hand at making something unique, we’ve got you covered. So, let’s dive into the world of 3D printing and see how it all works!
How does 3D printing work?
3D printing is a revolution in manufacturing and processing technology that allows for the creation of complex shapes from raw materials such as metals, ceramics and plastics. The most common 3D printing technology is called Fused Filament Fabrication (FFF). This technology works by heating PLA, or ABS thermoplastic filament that has been fed into an extruder head and then layered together, according to instructions given to a computer. This layer-by-layer construction method results in a three-dimensional model which can be used for countless applications.
The advantage of using FFF technology is that it requires low cost equipment and materials and there are no restrictions on geometric complexity. Printing times can also be fast depending on the complexity of the piece being created – perfect for rapid prototyping or creating multiples pieces at once. By using this process, companies can save both time and money while producing precise models with complex structures that would otherwise be difficult to manufacture.
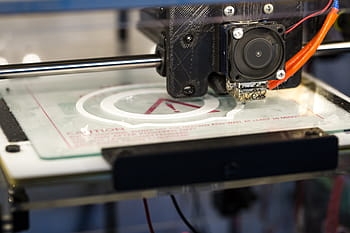
Choose a suitable 3D printer
The Raise3D Pro2 Series printer provides a great selection for people looking for an easy-to-use 3D printer. This series of 3D printers incorporates the FFF printing technology, which is very user friendly. The main components of a Raise3D Pro2 printer are the printing bed, extruder, moving parts, and touch screen. The printing bed is heated in order to make sure that the layers stick together firmly as the model is being printed. The extruder moves on three axes that enable it to precisely print complex shapes quickly. The touchscreen allows users to adjust settings as well as view a live preview of how the print will turn out. Additionally, this printer also comes with a feeding tray that can hold materials and feed them into the extruder with precision and accuracy.
Overall, the Raise3D Pro2 Series 3D Printer provides fast and easy operation that anyone can use without prior knowledge or experience of 3D printing technology. As such, it represents an ideal choice for somebody looking for an efficient and reliable 3D printer that can help them create complex shapes from various types of materials with ease. With its high-end features, advanced technology, and intuitive user interface, this series of printers is sure to be a great asset for any 3D printing enthusiast.
Design and upload your model
Once you have chosen the right printer, the next step is designing and uploading your model. If you’re starting from scratch, then you can use a CAD (Computer-aided Design) program to create your design. Once you are happy with it, you will need to save the file as an STL (Stereolithography) file, which is a format that is compatible with 3D printers.
Once you have saved the model in STL format, you can upload it to your 3D printer. Many 3D printers come with their own software programs that will allow you to load and prepare your model for printing. This software should also provide you with various settings and options that you can use to tweak the print quality, such as infill and layer height.
Print your model
Once the model has been uploaded to the 3D printer, it is time to start printing. The printer will attempt to read the STL file and generate instructions for the extruder head to follow in order to create the 3D model. During this process, you might need to adjust the settings of your 3D printer to ensure that the model is printed correctly. This could include adjusting the temperature of the extruder or changing the speed at which the filament is fed into it.
Once everything has been set up correctly, you can hit print and watch your 3D model come to life layer-by-layer. Depending on the complexity of your model, this process could take anywhere from a few minutes to several hours.
Finish and post-processing

Once the 3D model has been printed, you will need to do some post-processing to make sure it looks its best. This could include removing any excess filament from the model, sanding down sharp edges, and adding any desired finishing touches. Once you are happy with the finished product, it is time to admire your work and start thinking about your next project!
How to 3D print a model?
3D printing is a modern, cutting-edge technology that has revolutionized the way models are created. Unlike traditional processes like sculpting, or molding, 3D printing requires far fewer steps and can be completed in a short amount of time. Generally speaking, to print a model through 3D printing needs to go through four basic stages: modeling, slicing, printing, and post-processing.
The first step to 3D printing is modeling. This entails creating your desired model from a range of different software tools available. By assembling components from various collections of parts and tools, you can customize any specific details according to your desires and create an accurate 3D representation of the model you want for printing. After this step is complete and saved as an STL (STereoLithography) or OBJ (Object File) file format, the second step comes into play – slicing.
This process involves using specialized software to assign each layer of your 3D model into hundreds if not thousands of 2D layers which then passed on to the printer. An important element here is adjusting the print speed and material used during this stage as they will determine how long it will take for your item to be printed (among other attributes ).
The third step is printing. This involves putting together all the information gathered from the first two steps and feeding them into the 3D printer. Depending on the size, complexity, and material used, this process can take anywhere from a few minutes to several hours. After this process is done, you will have your desired model printed in full three-dimensional form.
The fourth stage is post-processing. This includes removing excess filament from the model, sanding down sharp edges, and adding any desired finishing touches. Once you are happy with the finished product, it is time to admire your work and start thinking about your next project!