How to Line a Leather Bag: A Step-by-Step Guide
Yes, you can absolutely line a leather bag to protect its interior and add a touch of style. Lining a leather bag involves sewing a fabric interior into the existing shell. This is a fantastic way to upgrade an old bag or customize a new one, offering both practical benefits and aesthetic appeal.
Adding a lining can prevent your belongings from snagging on rough interior leather. It also helps maintain the bag’s shape and can hide any existing wear or damage. Many people choose vibrant or patterned fabrics to make their bags truly unique. It’s a rewarding project for most DIYers with a little patience.
- Protect your leather bag’s interior.
- Prevent snagging and wear.
- Customize your bag’s look.
- Maintain the bag’s shape.
- Hide interior damage.
Ready to give your leather bag a stylish new interior? Let’s walk through exactly how this works step by step.
“`htmlAdding a Durable Lining to Your Leather Bag
You’re ready to give your leather bag a fresh interior. This project is totally doable for most DIY enthusiasts. It’s like giving your bag a brand-new personality from the inside out. You’ll find that lining a leather bag can protect the original material. It also makes the inside much smoother and more functional. Let’s get started on this rewarding transformation.
Choosing the Right Materials for Your Bag Lining
Selecting the correct materials is the first big step. You want fabrics that are durable yet attractive. Think about what you’ll be carrying and how much wear and tear the lining might face. A good lining should be easy to clean and shouldn’t snag your belongings.
Best Fabric Choices
Many fabric options work well for lining a leather bag. Cotton blends are a popular choice because they are sturdy and come in countless patterns and colors. You can also consider linen or even a synthetic fabric like polyester for extra durability. Some people even opt for a silky material for a touch of luxury.
- Cotton blends: Easy to work with, durable, wide variety of designs.
- Polyester: Very strong, resistant to stretching and shrinking, good for heavy use.
- Linen: Natural, breathable, but can wrinkle easily.
- Satin or Silk: Luxurious feel, but can be delicate and slippery.
When choosing, consider the weight of the fabric. A lightweight lining might not hold up well to heavy items. A fabric that’s too thick could make the bag bulky. We found that a medium-weight cotton or a poly-cotton blend often hits the sweet spot for most bags.
Thread and Notions
Don’t forget the other small but important items. You’ll need strong thread that complements your fabric. Consider a nylon or polyester thread for its strength and durability. A sewing machine is highly recommended, but you can hand-stitch if you’re patient.
You might also need a seam ripper if you’re working with an existing bag and need to remove old lining. Small pins or clips will help hold the fabric in place. For attaching the lining, a good quality sewing machine needle is a must. Experts recommend a universal needle for most fabrics.
Preparing Your Leather Bag for Lining
Before you can start sewing, you need to get your leather bag ready. This involves cleaning the interior and, if necessary, preparing the seams.
Cleaning the Interior
A clean bag makes for a better-finished product. If your bag is new, a gentle wipe-down might be all it needs. For older bags, you may need to use a leather cleaner specifically designed for interiors. Always test any cleaner on an inconspicuous spot first. Allow the interior to dry completely before proceeding.
We found that a slightly damp cloth with a bit of mild soap can work for many interiors. The key is to avoid getting the leather too wet. Always let it air dry thoroughly. This prevents mold or mildew, which nobody wants inside their favorite bag!
Measuring and Cutting Your Fabric
This is where your lining starts to take shape. You need to measure the interior dimensions of your bag accurately. It’s often easier to trace the existing lining, if there is one, or create a paper pattern. Measure the bottom, sides, and any pockets you want to incorporate.
It’s wise to add a small seam allowance, about half an inch, around all your pattern pieces. This gives you room to stitch the lining pieces together. Cut your chosen fabric precisely. Use sharp fabric scissors for clean edges. Double-check your measurements before cutting!
Patterning for Different Bag Types
How you create your pattern depends on your bag’s shape. For a simple tote bag, you’ll likely need a rectangular piece for the bottom and two large pieces for the sides. If your bag has a more complex structure, like a crossbody with many compartments, you might need to create individual patterns for each section.
Don’t be afraid to use old newspaper or craft paper for your first pattern. You can tape pieces together to get the right size. Once you’re happy with the paper pattern, you can then transfer those dimensions to your fabric. This approach saves precious fabric and reduces mistakes. Many crafters find this pattern-making step essential.
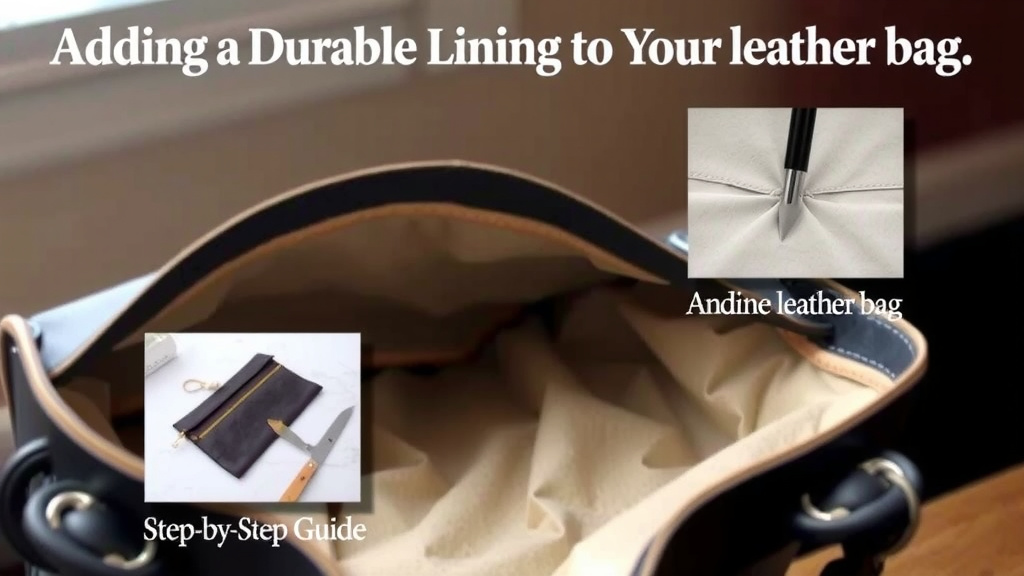
Sewing the Fabric Lining
Now comes the sewing part! This is where your fabric pieces transform into a functional lining for your bag.
Assembling the Lining Pieces
Start by sewing the main pieces of your lining together. If you’re making a simple rectangular lining, you’ll sew the side seams. Pin the fabric pieces right sides together. Sew along the pinned edges, keeping your seam allowance consistent. Use a straight stitch on your sewing machine. If hand-sewing, use a strong backstitch.
For bags with pockets, sew those onto the main lining panels before assembling the entire lining. This makes it much easier. We found that attaching pockets first is a tip many experienced sewers swear by. It prevents awkward maneuvering later.
Adding Pockets and Interior Details
Consider adding pockets to your lining. These are incredibly useful for organizing smaller items like keys, lip balm, or pens. You can sew simple patch pockets onto the main lining panels. Or, you can create more structured pockets with separate seams.
When sewing pockets, remember to finish the top edge of the pocket with a hem. This prevents fraying and gives a neat appearance. Think about the size and placement of your pockets. What do you usually carry that needs a dedicated spot?
Attaching the Lining to the Leather Bag
This is the final major step in the process. You’ll need to secure the fabric lining inside the leather bag. There are a few methods to achieve this.
Hand-Stitching Method
For a clean, almost invisible finish, hand-stitching is often preferred. You can carefully fold the top edge of the lining inward. Then, position it inside the leather bag, just below the top opening. Use a slip stitch or an invisible stitch to secure the fabric to the leather. This takes time and patience, but the result is beautiful.
We found that using a thimble can really help protect your fingers when pushing a needle through thicker materials. Taking your time here ensures that the lining stays securely in place and looks professional. Many sources suggest using a strong, doubled thread for this method.
Machine-Sewing Option
If your leather bag has a suitable seam or edge at the top opening, you might be able to machine-sew the lining. Carefully tuck the lining inside. You can pin it in place, ensuring the top edge of the lining is even with or slightly below the top edge of the leather. Then, carefully sew along the top edge of the bag.
This method works best if the bag’s design allows for it. For some bags, you might need to attach the lining to a separate band that then attaches to the bag. Always check the construction of your specific bag. This approach can be quicker but may not offer as discreet a finish as hand-sewing.
A Quick Checklist for Your Lining Project
To keep you on track, here’s a handy checklist:
- Gather all your chosen fabric, thread, and tools.
- Clean your leather bag’s interior thoroughly.
- Accurately measure and cut your lining fabric pieces.
- Sew your lining pieces together, including any pockets.
- Carefully attach the finished lining inside your leather bag.
- Inspect your work for a secure and neat finish.
Conclusion
You’ve learned how to give your leather bag a durable and stylish new lining. This project protects your bag’s interior and adds a personal touch. By carefully selecting materials and following these steps, you can successfully transform your bag. Taking the time to measure and sew accurately will ensure a professional-looking finish you’ll love. Now that you have the knowledge, your next step is to gather your supplies and start lining your favorite leather bag!
Frequently Asked Questions
Can I line a leather bag if I’m not an experienced sewer?
Yes, you can! While some steps require patience, lining a leather bag is a manageable project for beginners. Focus on accurate cutting and practice your stitching. Many people find success with simple, straight seams. Don’t be afraid to start with a less complex bag.
How do I prevent the lining fabric from fraying inside the bag?
To prevent fraying, you should always finish the raw edges of your fabric pieces. This can be done with a zigzag stitch on your sewing machine, or by using pinking shears before sewing. Also, ensure the top edge of the lining is neatly hemmed before attaching it to the bag.
What’s the best way to attach the lining so it stays in place?
Hand-stitching with a slip stitch or invisible stitch offers the most secure and discreet attachment. Fold the top edge of the lining inward and position it just below the leather’s top opening. Carefully stitch through both layers. This method ensures the lining won’t shift or pull away over time.
How thick should the lining fabric be for a leather bag?
A medium-weight fabric is usually best. Too thin, and it won’t hold up to daily use. Too thick, and it can make your bag bulky and harder to close. Cotton blends or poly-cotton fabrics often provide a good balance of durability and thickness for most leather bags.
What if my leather bag has an unusual shape or lots of pockets?
For bags with complex shapes or existing pockets, creating a detailed paper pattern first is essential. You can carefully trace the interior or even create a pattern around existing features. Take your time to get the pattern pieces exactly right before cutting your fabric. This planning saves material and frustration.
![10 Best Leather Bags Like Hermes [2026]](https://mybestreviewss.com/wp-content/uploads/2026/09/10-best-leather-bags-like-hermes-2026-featured-768x432.jpg)