DIY Leather Crossbody Bag: Step-by-Step Guide
Making your own leather crossbody bag is totally doable, even if you’re new to leathercraft! You’ll need a few basic tools and some leather, and you can create a stylish, durable bag. It’s a rewarding project that results in a functional accessory.
This DIY project lets you customize your bag’s size, color, and features. You can choose the perfect strap length and hardware to match your style. Many people find that making their own bags is more cost-effective than buying designer pieces.
- Gather your leather and tools.
- Cut your leather pieces accurately.
- Stitch the pieces together carefully.
- Add your chosen hardware and strap.
Ready to get your hands a little dirty? Let’s walk through exactly how to make your very own leather crossbody bag step by step.
“`htmlCreating Your Own Leather Crossbody Bag
Making a leather crossbody bag from scratch can seem a bit daunting, but with the right guidance, it’s an incredibly satisfying DIY project. You’ll end up with a unique piece that reflects your personal style and is built to last. This guide breaks down the process into manageable steps, perfect for anyone looking to try their hand at leathercraft.
Gathering Your Leathercraft Essentials
Before you even think about cutting leather, it’s important to have your tools and materials ready. Having everything laid out will make the process much smoother and more enjoyable. Think of it like a chef preparing their mise en place before cooking.
Choosing the Right Leather
The type of leather you select will greatly influence the look and feel of your bag. For a crossbody bag, you’ll want something durable yet pliable. Vegetable-tanned leather is a popular choice because it holds its shape well and can be tooled or dyed. For a softer feel, chrome-tanned leather might be better, but it’s generally less rigid.
Many leatherworkers suggest starting with a medium-weight leather, around 5-6 ounces. This thickness offers good durability without being too stiff to work with for beginners. You can often buy leather by the square foot or in pre-cut panels from craft stores or specialized online suppliers.
Essential Tools for Leatherworking
You don’t need a massive workshop to make a leather bag. Here are some basic tools that will get you started:
- Cutting Tools: A sharp utility knife or a rotary cutter is essential for making clean cuts. A self-healing cutting mat is also a must to protect your work surface and your blades.
- Marking Tools: A scratch awl or a silver pen specifically for leather is needed to mark your cut lines and stitch holes.
- Stitching Tools: You’ll need leather needles, a strong waxed thread (like linen or polyester), and an awl or a stitching groover to create your stitch lines. A stitching pony or clamp can hold your work steady while you stitch.
- Finishing Tools: A burnisher (like a wooden slicker) is great for smoothing the edges of your leather. Edge paint or beeswax can also be used for a polished finish.
- Hardware: Don’t forget your rivets, snaps, buckles, and D-rings! These are the functional and decorative elements of your bag.
Designing and Patterning Your Bag
The first step in creating your bag is deciding on its size and shape. Will it be a small, minimalist pouch or a larger tote-style crossbody? Sketching out your idea will help you visualize the final product.
Creating a Simple Pattern
For a basic crossbody bag, you’ll typically need a few key pieces: a front panel, a back panel, a bottom gusset, and two side gussets. Many free patterns are available online, which can be a great starting point if you’re a beginner. These patterns often include measurements and diagrams.
If you’re designing your own, measure your desired dimensions carefully. For example, if you want a bag that’s 8 inches wide and 6 inches tall, your front and back panels will be these dimensions. The gussets determine the depth of your bag.
Transferring the Pattern to Leather
Once you have your pattern pieces, trace them onto the flesh (rough) side of your leather using your scratch awl or marking pen. Make sure your lines are clear and easy to follow. It’s often a good idea to add a small seam allowance or stitching line guide.
Cutting and Preparing Your Leather Pieces
Accuracy is key in this stage. Sloppy cuts will make assembly more difficult and can affect the final look of your bag. Take your time and focus on making straight, clean lines.
Making Precise Cuts
Using your sharp knife or rotary cutter and a metal ruler, carefully cut along your traced lines. If you’re using a utility knife, you might need to make multiple passes to cut through thicker leather. Go slowly and steadily. Research and found that a sharp blade is crucial for avoiding ragged edges (Leathercrafting Guild).
Preparing for Stitching
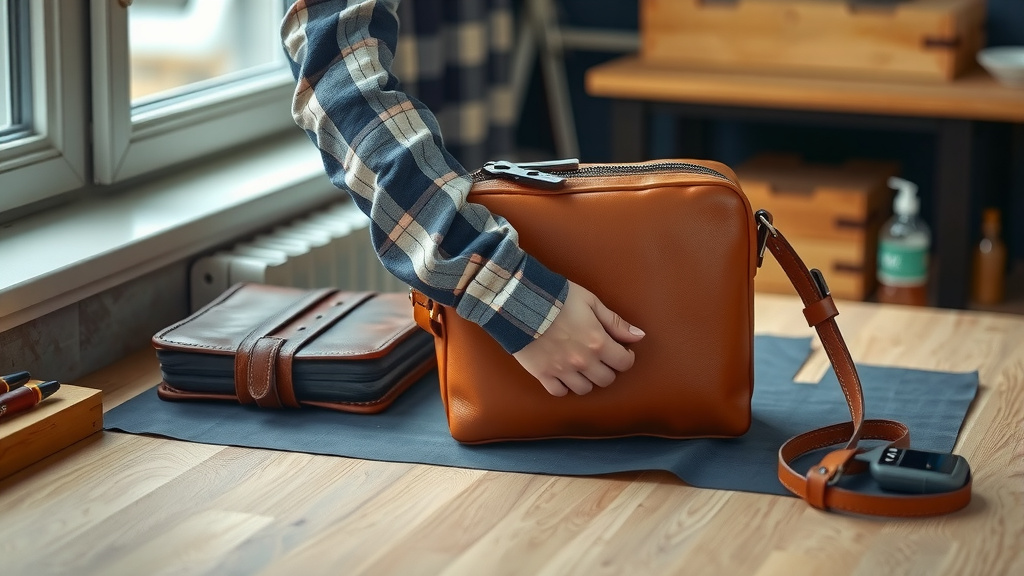
Before you stitch, you’ll need to mark where your holes will go. You can use a stitching groover to create a channel for your thread, which helps keep the stitches neat and protected. Then, use a pricking iron or a stitching chisel to punch evenly spaced holes along your marked lines. These tools are designed to create consistent holes that make hand-stitching much easier.
The Stitching Process: Bringing it All Together
This is where your bag truly starts to take shape. Hand-stitching leather is a traditional method that creates strong, beautiful seams. It takes patience, but the result is worth it.
Mastering the Saddle Stitch
The saddle stitch is the most common and strongest stitch for leather. It involves using two needles on a single strand of waxed thread, passing them through the same hole in opposite directions. This creates a lock stitch that is incredibly durable. Many experts say this stitch is superior to machine stitching for many leather goods (Artisan Leatherworkers Association).
Thread your needles, ensure your thread is long enough for the seam (usually 3-4 times the length of the seam), and begin stitching. Keep your tension even on both sides of the leather. Don’t pull too hard, or you might break the thread. Conversely, don’t pull too loosely, or your stitches will look sloppy and might not hold.
Attaching the Gussets and Straps
You’ll typically stitch the gussets to the bottom panel first, then attach the side panels. Finally, you’ll stitch the front and back panels to the assembled body. Make sure all your edges are aligned neatly before you start stitching each section.
The strap can be attached using D-rings that are riveted or stitched to the sides of the bag. You’ll also need a way to adjust the strap length, usually with a slider buckle. Attach the hardware securely; this is a point of stress for the bag.
Finishing Touches for a Professional Look
The final details can really elevate your handmade bag from “homemade” to “professionally crafted.” These steps might seem minor, but they make a big difference.
Edge Finishing Techniques
Neat edges are a hallmark of quality leather goods. You can use a burnisher with a bit of water or beeswax to smooth and polish the cut edges. Alternatively, you can use edge paint for a more colorful, sealed finish. Many guidelines suggest a multi-step process for achieving smooth edges (The Leather Crafter’s Manual).
Adding Hardware and Final Assembly
Install your chosen hardware like snaps, zippers, or magnetic closures. Attach your adjustable strap. Double-check that all rivets are set firmly and all stitching is secure. Give your bag a final wipe-down to remove any stray marks.
Here’s a quick checklist to ensure you haven’t missed anything:
- Pattern pieces accurately traced and cut?
- All stitching holes pre-punched?
- Leather pieces stitched securely?
- Hardware attached firmly?
- Strap adjusted to the correct length?
- Edges finished neatly?
You’ve done it! You’ve created your very own leather crossbody bag. Now you can enjoy carrying a stylish, durable accessory that you made with your own two hands.
“`Conclusion
You’ve successfully navigated the steps to create your very own leather crossbody bag! Remember, the key to a great handmade bag lies in careful preparation and patient stitching. You’ve learned how to select the right leather, master essential tools, and bring all the pieces together with strong seams. This project proves that with a little effort, you can craft a functional and stylish accessory that’s uniquely yours. Now, take your finished bag out and about, or start planning your next leathercraft creation!
Frequently Asked Questions
What’s the easiest type of leather for a beginner to use?
For your first crossbody bag, consider using a medium-weight vegetable-tanned leather, around 5-6 ounces. It’s durable, holds its shape well, and is forgiving if you make small mistakes. Avoid very thin or very thick leathers until you get more comfortable with cutting and stitching.
How do I avoid jagged edges when cutting leather?
The trick to clean cuts is a very sharp blade and a steady hand. Use a high-quality utility knife or a rotary cutter along with a metal ruler. For thicker leather, multiple shallow passes are better than one deep cut. Always cut on a self-healing mat to protect your work surface and your tools.
Is hand-stitching really stronger than machine stitching for leather bags?
For many leather goods, the saddle stitch, done by hand, is considered stronger and more durable than typical machine stitching. This is because the lock-stitch created with two needles forms a very secure seam that is less likely to unravel if a single thread breaks. It also gives your bag that beautiful, artisanal look.
What’s the best way to attach the strap to my crossbody bag?
You’ll typically attach the strap using D-rings or rectangle rings. These can be securely fastened to the sides of your bag using rivets or by stitching them directly into the seams. Ensure the attachment points are reinforced, as they’ll bear the weight of your bag.
How can I make the edges of my bag look smooth and professional?
To get smooth edges, you’ll want to finish them after cutting. Start by using a burnisher (a wooden tool) with a little water or beeswax to slick down the fibers. For an even more polished look, many crafters use specialized edge paint, applying thin, even coats and allowing them to dry completely between applications.
![10 Best Luxury Leather Bags [2026]](https://mybestreviewss.com/wp-content/uploads/2026/08/10-best-luxury-leather-bags-2026-featured-768x432.jpg)